
Account settings
Use the Settings page to configure options that apply to the entire account, such as call capacity limits, retention periods for recordings and transcripts, and data masking in call records.
To open the page, select Settings in the navigation pane.
The page contains three tabs. Select Update to save changes on the current tab.
| Tab | Description |
|---|---|
| Account details | View and update the account name, account ID, and description. |
| Advanced | Configure call limits, maximum call duration, retention periods, privacy settings, and alarm notifications. |
| Contacts | Manage the email addresses that AudioCodes uses for account communications. |
Update your account details
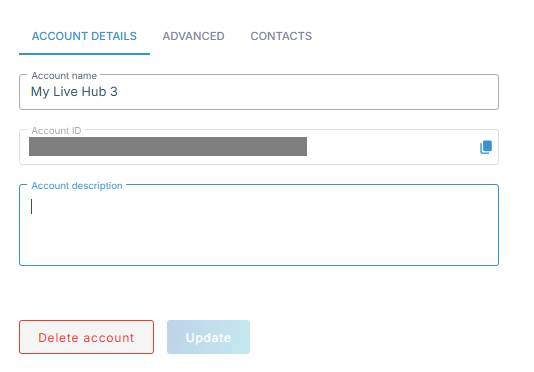
The account's name and description are on the Account details tab.
To change the account's name or description:
-
In the Navigation pane, select Settings.
-
On the Account details tab, edit the 'Account name' or 'Account description' field.
'Account ID' identifies the account to the REST API and cannot be changed.
-
Click Update.
Billing details, including the address needed before you can add credit, are held separately. See Billing.
Configure call limits
Call limits define the account's Call Admission Control (CAC) settings. They determine how many calls the account can establish per second and how many active calls it can handle at one time.
Live Hub blocks any call that would exceed these limits.
Call limits apply at multiple levels. SIP and Teams connections can have their own limits, but the account limit overrides them. Live Hub enforces the most restrictive limit, so a connection cannot exceed the limit configured for the account.
Configuration per account
The account limit is set by AudioCodes, not by you.
To view the account call limit:
-
In the Navigation pane, select Settings.
-
Select the Advanced tab, and read 'Call limits'.
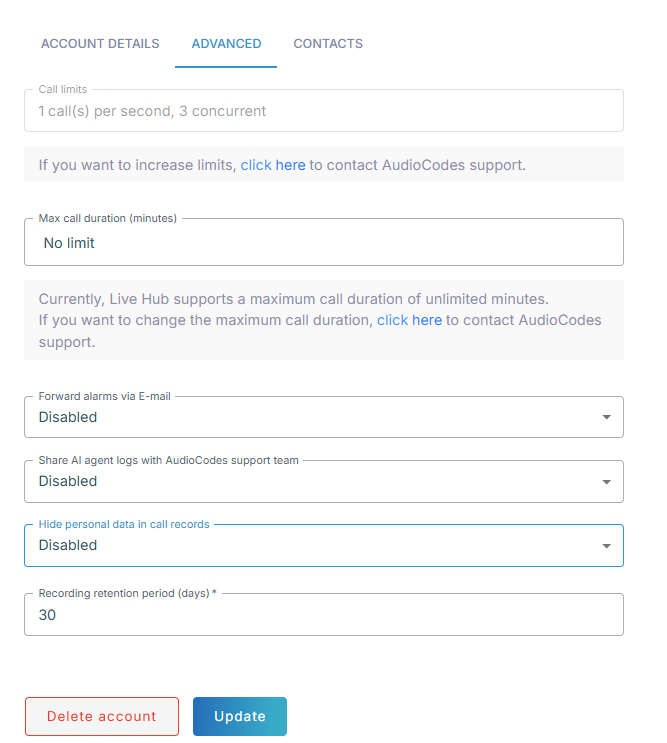
To change it, use the link beside the field to contact AudioCodes support. The account limit can go up to 20 calls per second and 600 concurrent calls.
Configuration per SIP connection
Each SIP connection has its own call limits. To view them, open the connection's Info tab.
To view a SIP connection's call limits:
-
In the Navigation pane, select Voice channels, and then open the SIP connections tab.
-
Click Edit on the SIP connection, and then select the Info tab.
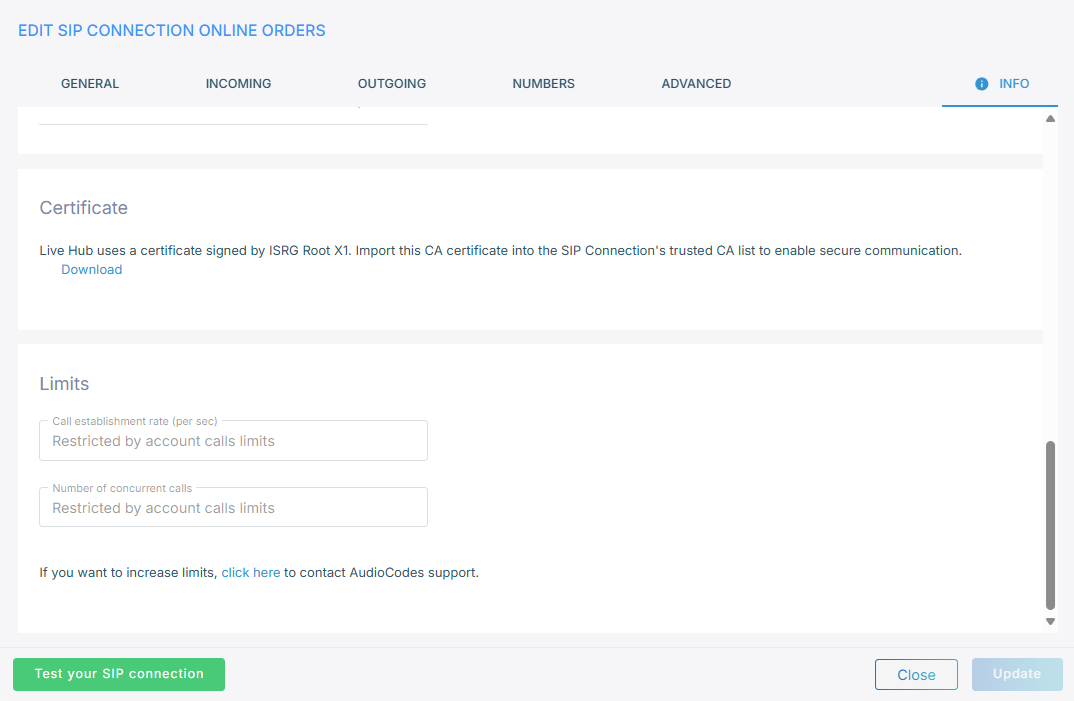
The connection can be left unlimited, or capped at up to 20 calls per second and 600 concurrent calls.
Configuration per Teams connection
A Teams connection takes its call limit from a CAC profile that you select on the connection.
To set a Teams connection's call limits:
-
In the Navigation pane, select Voice channels, and then open the Microsoft Teams tab.
-
Click Edit on the Teams connection.
-
From the 'Call limits' drop-down list, select the CAC profile, and then click Update.
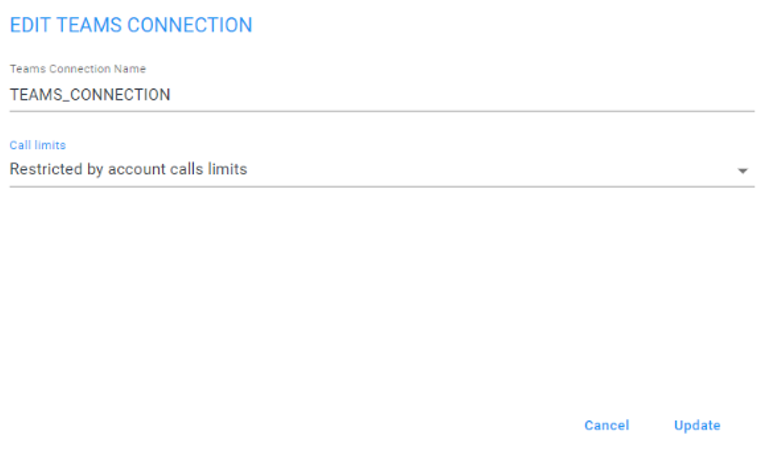
You can leave the connection limit unlimited or set it to a maximum of 20 calls per second and 600 concurrent calls.
Configure maximum call duration
The Maximum call duration setting limits how long a call can remain active. Live Hub automatically ends any call that exceeds the configured duration.
To set the maximum call duration:
-
In the Navigation pane, select Settings.
-
Select the Advanced tab.
-
In the 'Max call duration (minutes)' field, enter the limit, and then click Update.
The field states the longest duration Live Hub currently supports. Use the link beside it to ask AudioCodes for a longer one.
A maximum duration can also be set per bot connection, SIP connection, phone number, and Teams connection. None of them can exceed the account's. Set 30 minutes for the account, 40 for a bot, and 10 for a phone number, and calls run for at most 30 minutes on that bot and 10 minutes on that number.
Hide personal data
Enable 'Hide personal data in call records' to mask caller phone numbers in call records. Live Hub replaces the digits with asterisks to help protect personal information.
To hide personal data in call records:
-
In the Navigation pane, select Settings.
-
Select the Advanced tab.
-
From the 'Hide personal data in call records' drop-down list, select Enabled, and then click Update.

The SIP ladder is switched off for those calls as well, since the messages carry the numbers too. See Data privacy.
Configure recording retention
Recordings are deleted automatically after 30 days unless you change the retention period.
To change the recording retention period:
-
In the Navigation pane, select Settings.
-
Select the Advanced tab.
-
In the 'Recording retention period (days)' field, enter a number of days: at least 1, and no more than 90.
-
Click Update.
Changes to the retention period take effect the next day and apply to existing recordings and transcripts as well as new ones.
Set the retention period to 1 day to minimize retention. Live Hub removes data after one day, effectively disabling long-term storage.
Retention settings control how long Live Hub keeps recordings and transcripts. To enable or disable call recording, configure the appropriate bot connection setting.
Configure transcript retention
Live Hub keeps transcripts for 7 days by default. The retention setting applies to all data that contains transcribed speech, including AI Agent logs.
To change the transcript retention period:
-
In the Navigation pane, select Settings.
-
Select the Advanced tab.
-
In the 'Transcript retention period (days)' field, enter a number of days: at least 1, up to a year.
-
Click Update.
Changes to the retention period apply to existing transcripts as well as new ones. Live Hub applies the new retention period the next time it runs the cleanup process. To stop generating transcripts all together, disable Call transcript on the bot connection.
Share AI agent logs with support
Enable 'Share AI agent logs with AudioCodes support team' on the Advanced tab to allow AudioCodes Support to access your AI agents logs when investigating an issue.
This setting applies to the current account and covers logs generated by its AI Agents. Parent accounts do not include this setting because they do not have AI Agents of their own.
For more information, see Support.
Forward alarms by email
Enable 'Forward alarms via email' on the Advanced tab to receive email notifications when alarms are raised or cleared.
For information about configuring alarm notifications and thresholds, see Alarm thresholds and notifications.
Contacts
Use the Contacts tab to manage up to 10 email addresses for the account. - To add an email address, select Add. - To remove an email address, select the Delete icon next to the address.
AudioCodes uses these email addresses for account-related communications. If you do not configure a dedicated support email address, AudioCodes Support uses the first address in the list as the account contact.
Delete the account
Select Delete account on the Settings page to start the account deletion process.
For step-by-step instructions, see Delete an account.